Showing posts with label Vegetarian. Show all posts

Tuesday, December 7, 2010

Food nostalgia: Cheesy Hashbrowns


I really started to cook when I lived in California. The abundance of fresh, local produce available year-round and my meager AmeriCorps salary meant that it made the most sense to learn how to cook with unfamiliar, inexpensive ingredients and hope for the best. Plus, good food permeates the city, from the late-night street meat in the Mission to foodie meccas like Chez Panisse and Coi. It was hard not to get swept away by the foodie-ness. Because I came to cooking-age out West, my weekly meal planning leans towards more simple, produce-centric dishes. Sure, I keep my pantry stocked with some tomato puree, veggie bullion, and generic bread crumbs, but other than that I don't often used canned or pre-packaged ingredients. But, something about this time of year brings out my inner wannabe-1950's Midwest housewife who just wants to make casseroles and hotdishes and all sorts of hearty, cheesy goodies that use exotic ingredients like cream of mushroom soup. The idea of Semi-Homemade Cooking usually weirds me out, but the thought of a tater tot hotdish (a favorite in my household growing up) or a tuna casserole...boy oh boy does that brings me back to very cold Minnesota evenings, fighting with my brothers and making ice traps in our annual snow fort. Ahh, the good old days.

My absolute favorite hotdish is the cheesy hashbrown casserole that is a staple of our Christmas morning brunch. My aunt makes two massive pans of it to feed the ever-growing Irish Catholic crew. I tell ya, there are few things in the world I love more than cheese and potatoes. I had attempted this dish a few times in college, but much to my chagrin, it was never the same. I tried it with home-shredded potatoes and creamy bechamels and a variety of different cheeses, and nothing! So, I gave up and decided that my cheesy hashbrowns would just have to wait for Christmas morning. I stopped believing in Santa when I was 6 or so, but I still wake up with the giddiness of a child on Christmas morning, anxious for the annual spread of hashbrowns, oatmeal-molasses bread (which we cousins sneakily eat throughout the day like a high schooler with a flask), and 24 hours of A Christmas Carol.

All of this reminiscing about food and Christmas and family is probably unnecessary, but now maybe you can imagine my excitement to have those very same cheesy potatoes show up at Fakesgiving, a vegetarian Thanksgiving celebration hosted by a friend of mine. I asked the chef how he made those delectable taters, and he told me all you need are some frozen hashbrowns, canned soup, sour cream, and some cheese. Seriously? All I have to do is go buy some prepacked products, chop up an onion, and stir? That's all? No scrubbing or peeling, no dicing, no making a sauce? Sandra Lee, you might just be onto something.

Traditionally (at least during my childhood), cheesy hashbrowns are made with a bright orange sharp cheddar, but I only had white cheddar on hand for this batch. Sometime this winter (as I'm sure I'll be making this every week or so) I'm going to try this with some gruyere or a mix of cheeses, for a little extra pizazz. Also, to make me feel just slightly better about eating at least two daily servings of what is essentially carbs wrapped in cheese, I added in some frozen chopped broccoli. Lastly, you can make this with cream of chicken soup, but the cream of celery adds a nice touch of flavor that brings out the sour cream and cheese.


Cheesy Hashbrowns

1 large (1 1/2 to 2 pounds) bag frozen hashbrowns, thawed
1 medium onion, chopped
2 cups sour cream (I've used light and haven't had any problems)
1 can of cream of celery soup
1 tsp. salt
1 tsp. pepper
2 cups shredded cheddar cheese, plus extra for the top
2 boxes frozen chopped broccoli

Bread crumbs (panko will work too, or, according to my research, crushed Ritz crackers or cornflakes)
Cooking oil spray

1) Preheat oven to 350 degrees. In a large bowl, mix all the ingredients except for the bread crumbs and extra cheese. Pour into a large greased baking pan.

2) Sprinkle the rest of the cheese on top, and then a sprinkle it again lightly with bread crumbs. Spray the top with cooking oil until well coated - this will help it brown and not to burn.

3) Bake until top is browned and potatoes are soft, about 45 minutes.

4) Eat, and reminisce about your favorite childhood foods...

...Happy Winter!


Thursday, December 2, 2010

It's Choux Time, Part 2: Baked Gnocchi (ala Gnocchi Parisienne)


Gnocchi is one of those things I feel like is easier to learn if you spent a lot of your time watching your grandma make it. It's a dish I'm scared to attempt, especially after hearing how hard it is to make the perfect gnocchi. I've been trying with easier versions, namely ricotta gnocchi that has not ended up as light and fluffy as I have hoped. When I saw a recipe for gnocchi parisienne, I was excited to find a new way to approach the dish, using the choux dough I've become so fond of.

The process of piping and cutting the dough into boiling water (described below) sounds weird and difficult, but is actually pretty gosh darn easy. I read one recipe that recommends transferring the cooked gnocchi to a baking dish to dry in a single layer. I'm going to try that next time - the gnocchi was so delicate even after it cooked that it mushed up a bit when I put it in a bowl before baking it. I actually ended up browning the gnocchi in a bit of olive oil before mixing it with the sauce.


I'm thinking the possibilities for sauces for gnocchi parisienne are endless. Pretty much anything you'd put into a baked pasta will work here. Also, when you're serving this up, keep in mind the gnocchi are deceptively filling - they taste all light and airy, but are packed in with a lot of butter and flour.

Note: I've been using the Cordon Bleu recipe for my dough, which calls for four eggs. However, I found that the dough came out a eggier than my liking. So, I've adjusted it to three eggs. Try it either way, and see which you prefer.

Baked Gnocchi (ala Gnocchi Parisienne)

1 cup water
1/2 cup (1 stick) butter
1 cup flour
1 tsp salt
3-4 eggs (see note above)
1 large shallot, diced
2 large garlic cloves, minced
8 oz. sliced mushrooms
1 tsp. dried tarragon
1 6 oz. bag of baby spinach
1/2 cup cottage cheese or ricotta
2 cups (1 8 oz. bag) Italian cheese mix (mine was three cheeses - Mozzarella, Provolone, and Parm)

1) Preheat oven to 400 degrees. To make the choux dough: in medium stock pot, bring butter and water to a boil. Once butter is melted, remove from heat and stir in flour until dough is smooth and shiny with a wooden spoon (whisks don't work in my experience). Add eggs slowly and mix until well incorporated and smooth. Return to low heat and stir a minute or two to dry off any excess moisture.

2) In a large saute pan, cook the shallot and garlic in olive oil until soft. Add the mushrooms, tarragon, and a generous pinch of salt, and cook on medium-low heat until mushrooms are soft, 10-15 minutes.

3) Bring a large pot of water to a rolling boil. Transfer the choux dough to a 1-gallon ziplock bag and cut a small hole in the corner. Using one hand, squeeze the dough out of the bag. Using the other hand, cut the dough into 1-inch strips into the water with a kitchen night. Continue until all your dough is done. Gnocchi are ready when they float to the top of the pot. (If your pot can't hold all the gnocchi, remove some with a slotted spoon, transfer to a bowl or dish, and drizzle with a touch of oil.)

4) Add the spinach to saute pan with the mushrooms and cook until wilted, about 5 minutes.

5) In a large bowl mix together the cottage cheese/ricotta and 1 cup of shredded cheese. Add the gnocchi and spinach-mushroom mix and fold gently (be careful not to crush the delicate gnocchi.) Transfer to a greased pan and top with remaining cheese.

6) Bake until cheese is brown and crispy, about 30 minutes. Serve immediately.


Wednesday, December 1, 2010

It's Choux Time, Part 1: Gougeres


I am not a baker. Sometimes I toy with cookies, when I get a mad hankering for some sugar, and I try to make soda bread around St. Patty's Day. But really, the precision that good baking requires is just too time consuming and finicky for me. So, I was excited to discover just how easy choux (pronounced like "shoe") dough is. It's the same puffy, crispy, buttery dough used for eclairs, among other delicacies. So, for a foodie dinner party, I decided to try some gougeres (pronounced "goo-jairs") - delightful French cheese puffs.

Gougeres are kind of sweet (in the awesome sense, not the "not salty" sense). They look and sound all fancy (ooh, French!) but are essentially homemade puffy Cheez-Its. It took me about 15 minutes to make the dough and pipe out out the gougeres, and another 20 to bake. For foodie dinner party, I made a sweet potato mousse (just whip up one large cooked sweet potato with about a pint of heavy cream until soft peaks start to form) and used the same piping method described below to stuff the cooled gougeres (just make a small hole in the side and pipe in the mousse).


A couple of things I've learned as I've tried to recreate this dish. First, do NOT leave your dough to sit. It takes out all the puff of the puffy pastry. No good. I ended up with flat little disks and had to make a sort of "gougere whoopie pie" instead. Still cheesy and satisfying, but not what I was going for. Second, these things are good cold, but better warm. If you end up with some leftovers, reheat them in the oven to maintain the crispy exterior, instead of the microwave.

Note: I've been using the Cordon Bleu recipe for my dough, which calls for four eggs. However, I found that the dough came out a eggier than my liking. So, I've adjusted it to three eggs. Try it either way, and see which you prefer.

Gougeres
1 cup water
1/2 cup (1 stick) butter
1 cup flour
1 tsp salt
3-4 eggs (see note above)
1/3 cup shredded cheese (cheddar, parm, gruyere, etc)

1) Preheat oven to 400 degrees. In medium stock pot, bring butter and water to a boil. Once butter is melted, remove from heat and stir in flour until dough is smooth and shiny with a wooden spoon (whisks don't work in my experience). Add eggs slowly and mix until well incorporated and smooth. Return to low heat and stir a minute or so to dry off any excess moisture.

2) Let the mixture cool a bit, maybe 5 minutes. Grease a baking sheet in the meantime. Stir the cheese into the dough. Then transfer it to a gallon-size ziploc bag.

3) Cut a small bottom corner off, creating a hole about a centimeter wide. Pipe the dough onto the baking sheet (similar to squeezing a large tub of toothpaste or frosting something) to make dough into 1-inch dollops. The dough shouldn't spread too much while baking, so you can pack the gougeres in pretty tight.

4) Sprinkle the dough-dollops with any extra cheese and bake until golden brown, 15-20 minutes. Serve immediately.


Tuesday, November 30, 2010

Rachel's Mushroom Pâté


Here's a fanTAStic idea for the upcoming  now-upon-us holiday cocktail party and open house season, whether you're planning your own or attending at least seven per weekend until New Year's Day.  Let's face it: a platter full of the three C's (cheeses, crudité, and charcuterie) are super easy for hosts to throw together and will satisfy most guests, but c'mon....it gets a little predictable. 

The humble, lovely mushroom gets elevated to prize-winning hors d'oeuvres status in this easy-to-make, everyone-is-happy appetizer:  It's rich and delicious but not heavy!  It's non-gluteny and vegetarian!  It goes well with wine, beer, cocktails, and, my personal favorite, Champagne!  Serve it with thin baguette slices, warmed pita triangles, or simple stone-ground wheat crackers, which you can find just about everywhere.  Avoid any flavored or too-sturdy crackers that will overwhelm the pâté's delicate brilliance.  This Mushroom Pâté is so incredibly delicious you'll be making fresh batches and playing with variations all through winter.  It stores well in tupperware in the fridge, so make big batches and then dole it out to people you really like.  *A final note: Presentation matters here, because whipped-up mushrooms do not make the most attractive thing on a buffet table: place a molded round of this on a colorful plate and surround with fresh herbs or grapes, or do it the easier way and just use a brightly colored bowl to hold the goods, surrounded by crackers and breads.  Everyone will be begging you for this recipe.

K, wishing you Bon appétit and happy holiday party season!


*I would recommend at least doubling, if not tripling this recipe.  It is that good.  Plus, it'll hold up well to stretch over several parties.  IF you really have leftovers, it makes a fabulous sandwich with some roasted peppers.

1 c. onions, minced
2 c. assorted mushrooms, roughly chopped
2 T. unsalted butter

some salt and fresh pepper
about 1/2 t. each thyme and paprika
plus a pinch each of tarragon and cayenne
1/3 c. sherry
2/3 c. blanched almonds (while blanched whole almonds are sometimes hard to find, you can almost always  purchase "slivered almonds" which are blanched and then slivered in the baking or nut section)
1 c. cream cheese, softened and at room temp

Sauté onions and mushrooms in the butter for about 10 minutes over medium-high heat, until they're nice and soft.  Add the next ingredients--salt through sherry--and sauté everything another 10 minutes or so.  At that point there shouldn't be too much liquid at the bottom.  If there is, keep cooking until it's mostly--but not totally--absorbed.

Meanwhile, pulverize the almonds  in your food processor until smooth.  Add in cream cheese.  Then add the mushroom mixture to the puréed nuts and cream cheese.  Whirl it around a few minutes until the mixture's nice and smooth.  Taste, and add salt and pepper if necessary.  Place in a sealed tupperware in the fridge.  See above for serving ideas.

Sunday, November 28, 2010

Roasted Apple Risotto with Almonds and Arugula

 
This was one of those make-it-up on the spot recipes that worked out phenomenally well.  It started when roomie and I walked over to the Bloomfield farmer's market on a nice fall afternoon, and I wanted to buy some apples for lunches and snacking and such.  I bought a small basket of Cortlands, which the farm lady said would be great for eating as is.  Sadly, she was wrong.  The apples were totally wrong in taste and texture: slightly mushy/mealy, bland, and sad.  I didn't want to waste them, of course, and I considered ways I could cook them into something lovely.  Not too long before this apple shopping mishap, roomie had made a simple and delicious basic risotto with roasted sweet potatoes just gently stirred in.  It was delicious and comforting and oozed of homey fall goodness, so I thought I'd try to create a similar kind of sweet and savory autumnal risotto to redeem the bad apples.  So it's a pretty basic risotto, subbing in red onion and red wine for their usually yellow/white counterparts, with the addition of some roasted apple pieces and soymeat crumbles.  I don't usually brag too much, but this risotto on its own is really fantastic.   If you want to fancy it up even more and plate it restaurant-style to impress someone, instructions for that follow.  I listed the ingredients in a helpful prep order.

K, in creamy fall heaven!

 
Roasted Apple Risotto
1/2 tube Gimme Lean soy sausage, crumbled, and browned in a bit of canola oil (you can use the extra to make breakfast patties or just freeze it for future use)
3-4 unhappy apples, cored, diced, tossed in canola oil and roasted at 350 until soft and caramelized

2 T. unsalted butter
1 medium red onion, diced
1 1/2 c. arborio rice
scant 3/4 c. red wine (I used a pinot noir)
3-4 c. hot broth or stock
fresh thyme stripped from 3-4 sprigs 
1/2 c. grated Parmesan cheese
salt and pepper to taste

1. Brown the soy sausage and roast the apples while you prep and measure out the other ingredients and heat the broth or stock you're using.  Cover and set aside apples and soy sausage when done.
2. Melt butter over medium-high heat, add onions, and sauté until nice and soft.  Sprinkle with a bit of salt.
3.  Add rice to onions, and toss to coat in butter.  Cook just under 2 minutes.  Then add red wine, and stir until most, but not all, of the liquid is absorbed by the rice.  Add thyme.
4.  Add hot broth by the ladleful, stirring continuously and not adding more broth until the previous batch is mostly absorbed.  After adding 3 cups, taste the risotto for doneness.  The rice should be cooked but still firm--not mushy.  If it's too hard, keep adding broth until the proper tenderness is achieved.
5.  When the rice is fully cooked, stir in Parmesan, and add salt (at least 1/2 t.) and pepper to taste.  Stir in apples and soy sausage.  Cover the pot and let risotto rest for 2-3 minutes to warm the apples and soy sausage.  Stir the risotto and then spoon it into bowls and serve immediately.  Pass additional Parmesan for cheese freaks like me (and roomie).

If you want to fancy this up restaurant-style...
(1) prepare a balsamic syrup by reducing about 1/4 cup of a nice Balsamic with a few teaspoons of sugar over medium high, until the vinegar turns the consistency of a light syrup.  Add salt and sugar to taste if necessary.
(2) toast a few handfuls of slivered almonds until toasty brown.
(3) clean and dry a few bunches of arugula.

Plate a nice scoop of the risotto next to a handful of bright arugula.  Drizzle both with about a teaspoon of the Balsamic syrup; sprinkle with toasted almonds.  Win over the souls of your guests.

Tuesday, November 16, 2010

Sweet Potatoes and Chickpeas with Walnut-Kale Pesto


The inspiration behind this meal was actually a frozen Kashi meal, Mayan Bake.  It's delicious, if you haven't tried it - quinoa, black beans, plantains, sweet potatoes, and kale.  I loved the idea of sweet potatoes and kale.  I enjoy the hearty green, but I get sick of just cooking it up with some onions and mushrooms.  So, I did a google search for "kale pesto" and bought some walnuts and I was ready to go.  

The first time I made this, I tossed it with pasta instead of chickpeas and I used a lot more olive oil.  I wanted a chunkier pesto this time around - just add the olive oil until you like what you see.  Also, I tried using lacinato or Tuscan kale this time around, but I recommend the regular curly kale, since it cooks softer and makes a smoother pesto.  

The flavors in this are pretty subtle, so it might not be an instant crowd pleaser.  Kale just doesn't pack the same punch as a basil or parsley based sauce.  But for me, it's hearty and healthy and with an extra sprinkle of Parmesan, it's a satisfying fall treat. 

Roasted Sweet Potatoes and Chickpeas with Walnut-Kale Pesto

1 large sweet potato, peeled and chopped into half-inch cubs
1 15-oz. can of chickpeas, drained and rinsed

1 bunch curly kale, torn into chunks
1/2 cup whole walnuts
4-5 cloves
1 tsp. lemon juice
Olive oil
1/2 cup shredded Parmesan, plus more for garnish

1) Pre-heat oven to 350 degrees.  Toss sweet potato with olive oil and salt and roast until soft and brown.  About 20 minutes into the cooking, throw in the chickpeas.

2) In a large pot, bring a cup or two of water to a boil. Add the kale and a pinch of salt and cook until the kale is very soft, about 10 minutes.

3) In a food processes, pulse the walnuts until coarsely chopped. Add kale, garlic and lemon juice.  While food processor is on, add olive olive until well blended and the consistency you like.  Taste at least once for garlic, salt, and lemon juice.

4) Stir in Parmesan.

5) When sweet potatoes and chickpeas are finished, toss in a large bowl with kale and garnish with additional parmesan.

Wednesday, November 10, 2010

Instant Love: My Immersion Blender (and some soup)

Favorite Kitchen Tools

There are a few things in our kitchen that I use all the time. My bright red cast iron dutch oven, my santoku knife, my knife sharpener, a cutting board and a heat resistant spatula are usually all I need for a meal. The immersion blender, on the other hand, is one of those devices I don't use regularly, but whenever I do, I am in awe of how much easier it makes my life.  As I've mentioned previously, I am a clumsy woman and a damn clumsy cook.  Anything requiring the transport of hot heavy liquids into a standing blender usually ends in disaster.  Plus, I hate lugging out the blender or food processor and cleaning it and inevitably not cleaning it well enough so having to clean it again.  Such a pain.  That, my friends, is where my immersion blender comes in. Just one little device I can stick into the pot I'm already using, then rinse it off and stick in my dishwasher. Amazing!  Why don't I do this more??

Last week, I had a few foodie friends over for a New American themed dinner party where people were instructed to prepare a course and bring an appropriate beverage pairing.  In keeping with the season, I made a Celery Root Puree Soup (paired with prosecco, for those of you who were wondering). 


Celery Root Soup

1 large shallot, chopped
3-4 cloves garlic, chopped
1 large celery root (2 1/2 to 3 lbs), peeled and chopped
2-3 medium yukon gold or red potatoes, peeled and chopped
3/4 cup white wine (or one 187mL mini-bottle)
2 granny smith apples, peeled and chopped
4 cups stock
1 tbs. dried tarragon
1/2 cup shredded gruyere

In a large stock pan, saute the shallots and garlic with some salt and olive oil.  Add celery root and potatoes and stir till covered with oil.  Add white wine and cook about 3 minutes (to cook off the alcohol).  Add stock, apples, and tarragon and cook until celery root and potatoes are well cooked, 30-40 minutes.  Puree using immersion blender until smooth (strain through sieve if you want it even smoother).  Add gruyere and stir until melted.  Serve hot with additional gruyere (or gruyere chips - just bake some shredded gruyere until light brown). 

Sunday, October 31, 2010

Beet Risotto


A while back, two of my favorite foodie friends and I were discussing the best way to make a beet risotto.  Better to make a simple risotto base and top it with beets at the end?  Or better to make a beet stock and infuse the whole dish with beet-red goodness?  This prompted a beet-themed dinner party, replete with beet risotto, beet salad, beet chutney, and a chocolate beet cake.

I decided to go for the beet-stock risotto, because I wanted to see just how colorful it could get.  And my, did it turn fuchsia!  It was like Lisa Frank had decorated my plate (in a good way). And while the color infused the entire dish, the beet flavor wasn't too overwhelming.  The additions of dill, goat cheese, and some fried onions added a lot of flavor that balanced out the beetiness. I tried topping it with some makeshift beet "croutons," hoping to add a little more beet flavor and a little crunch, but they didn't get as crispy as I hoped.  Oh well. 

When I first tried making this risotto, I actually prepared the stock the night before by boiling the beets in some veggie stock until they were cooked.  This time, I just threw large beet slices in with the risotto for about the first 20 minutes it was cooking, and then removed them while the rice finished.  Both way has the same effect, and the second saved a bit of time.  I also tried throwing in some arugula this time, but I prefer the dill - it was a little more balanced than the spiciness of the arugula.


Beet Risotto with Goat Cheese


1/2 cup diced onions
3-4 large cloves garlic, minced
1 cup arborio rice
1/2 cup white wine
3-4 beets, peeled and quartered
3-4 cups stock
1/3 cup goat cheese crumbles, plus more for garnish
1 1/2 tbs. chopped dill, plus more for garnish
1 large shallot, thinly sliced

1) Saute onions and garlic in olive oil and a pinch of salt until soft and aromatic
2) Add rice, mix until rice is covered with oil, and toast for about a minute.  Add the wine and cook over medium heat until wine is fully absorbed.
3) Add in the beets and enough stock to cover the rice and beets (2 to 2 1/2 cups).  Over medium low-heat, cook the rice and beets, stirring regularly. See the basic risotto recipe I use for more information on how to cook risotto. 
4) After about twenty minutes, before the rice is done, take out the beet quarters.  Chop a few up to use for garnish, and reserve the rest for a salad or any of your other beet needs. 
5) Right as the risotto is finishing (the rice is al dente and the starch has made it all nice and creamy) add the goat cheese and dill.  Stir well, and keep reduce heat to low.
6)  In a separate sauce pan, heat up a few tablespoons of vegetable oil or other oil with a high smoking temp (not olive oil or butter) over high heat.  When the oil is very hot, add the sliced shallots and cook until browned, stirring regularly to avoid burning them.  Remove to a small plate with a paper towel and sprinkle with salt while still hot. 
7) In a large bowl or individual dishes, serve up the risotto.  Garnish with fried shallots and left over goat cheese and dill.  A nice Riesling or sweeter sparkling wine would add a final tasty touch. 

Who knew risotto could be so pretty?

Wednesday, October 13, 2010

Chipotle Spiced Kabocha Squash Soup


Squash season is here!  Roomie and I were talking a few nights ago about how winter squash can be intimidating sometimes .  And, kind of a pain in the butt.  Who hasn't tried to peel a butternut squash and chop it into pieces?  Or to thwack an acorn squash in half?  It ain't always easy!  Even with a good knife and some pent up aggression, getting those suckers cracked open is no piece of cake (or pie...pumpkin pie...).  But, squash soup, squash risotto, stuffed squash, roasted squash...So delicious.

I don't really know much about kabocha squash, other than I think it's the kind they use in pumpkin curries.  It's Japanese in origin, and according to the Whole Foods sign hanging on the bin, kabocha is sweeter and less stringy than an acorn squash (which the kabocha resembles). So, what the heck, why not try something new, eh? There were two varieties at the market - red and green - so I picked up one of each for kicks. I was teetering between Asian and Mexican flavors for the soup, and I thought this would be a good opportunity to use some of the dried peppers I picked up in Oaxaca earlier this year. Mexican it was!  I was also hoping to use the kabocha seeds themselves as a garnish, but roasting them ended up kind of failing - they're too big and chewy.  Pepitas, though, would be a nice touch for a little extra texture to the soup.

Out of sheer laziness, I decided to roast the squash.  I could have peeled 'em and chopped 'em up and let it all cook in the stock, thus saving some the time you'd have to wait for the squash to roast.  But I decided I'd rather wait a half-hour to roast the squash (during which I could cook a second dish or watch some tv) instead of getting frustrated with having to break down those little pumpkin suckers.  And probably chopping a finger off.  Once the squash was soft from the oven, all I had to do was scoop out the meat.  Easy stuff. The squash straight out of the oven, by the way, was deliciously sweet and smooth.  Kabocha was definitely the right choice.

Cooking this soup reminded me of how much I love my immersion blender.  I'm a clumsy cook (really, I'm just a clumsy person) - I spill and I slip and I drop pans and all that jazz.  Roomie, who was eating in the other room while I made this recipe, asked me at least three times if I needed any help (after dropping a few things and burning my hand.  Sweet.)  Anyway, when I used to have to puree soups in a standing blender, I would inevitably end up spilling the stock and putting in too much and making a crazy mess.  Even now, if I do use my standing blender, I just spoon out the solid stuff (potatoes or squash usually), puree them alone, and add them back to the stock.  But, with an immersion blender, I don't need to deal with any of that.  Plug in the blender, whirl it around the pot where my food is already cooking, and viola, puree! If you like pureed soups (or tomato sauces, or smoothies) without the hassle of a standing blender, it's definitely worth the investment.  Or do like I did, and ask for one for Christmas.

Thoughts after leftovers for lunch: This soup needs a bit of acidity, but I'm not quite sure how to achieve it.  A squeeze of lemon juice might suffice, but it also might overwhelm the squash and chipotle flavors.  Maybe some zest?  A chimichurri sauce?  Or at least a knock off of chimichurri, probably closer to a cilantro pistou. Good plan...


Chipotle-Spiced Squash Soup

2 Kabocha squash (I used one red and one green, about 5 pounds in total)
1/2 large onion, chopped
3-4 large cloves garlic, chopped
1 tbs. cumin
2 tsp. chile powder
4 cups stock (one box's worth)
3-4 dried chipotles (I'm sure canned chipotles will do, as well)


1 bunch cilantro
2 tbs. olive oil
2 tbs. lemon juice
3-4 large cloves garlic


Ricotta/plain yogurt/crema
Pepitas


1) Preheat oven to 375-degrees.  Quarter the squash and scoop out the seeds.  Place on a greased cookie sheet and roast until squash is soft enough to scoop out, about 30 minutes.

2) Remove squash from oven. Using a towel to protect your hands and a large spoon, scoop out the meat of the squash into a large prep bowl. It doesn't have to look pretty - it'll keep cooking and get pureed later.

3) In a large stock pan, saute the onion, garlic and a hefty pinch of salt in olive oil over medium heat until soft and slightly translucent (about five minutes).  Add the cumin and chili powder and stir to coat the onion and garlic.  Cook a couple of minutes, until you can smell the cumin and chili throughout your kitchen.

4) Add squash, stock, and chipotle peppers and stir until well mixed.  Reduce heat to low and let simmer for 20-30 minutes.  Taste about 10 minutes in to see if more salt or spice is needed. (Cumin and chili will add some earthy smokiness. Smell 'em to see which one you like more - I like cumin.  Throw in another chipotle pepper or some red pepper flakes if you want more heat.)

5) While the soup is simmering, in a food processor blend together the cilantro, olive oil, lemon juice, remaining garlic, and a pinch of salt.  Blend until its about the consistency of a pesto. Add more olive oil as necessary.

6) Using an immersion blender, puree the soup until smooth.  

7) Ladle soup into a bowl and add a dollop of ricotta/yogurt/sour cream/etc (whatever you have on hand) and a spoonful of the cilantro pesto and garnish with some pepitas.  Serve hot!

Serves 6-8.


Friday, October 8, 2010

Eggplant Caponata (or "Gobbladina")


I know that October indicates that we're pretty firmly into autumn, but I associate this classic Italian eggplant relish, Caponata, with summertime parties at my Italian grandparents' house.  For some reason, my grandmother calls this dish "Gobbladina," as in, it's-so-incredibly-delicious-everyone-wants-to-gobble-it-up.  To this day, I'm not totally sure why she gave it that nickname.  When I was a kid this was one of my favorite foods made by Grandma; of course it was always homemade to her exact specifications, like everything else that came out of her kitchen--or house, for that matter (she was also a highly accomplished dressmaker).  Since I got to enjoy it only a few times a year, Gobbladina always felt like a really luxurious, rare treat--my parents never made it and believed that the pre-made "caponata" sold in jars in supermarkets just couldn't match up to the sweet, slightly spicy, wonderfully gooey delicacy that Grandma could create from a few humble vegetables: eggplant, onion, and tomato. The remarkable thing is that Gobbladina is incredibly easy to make, and it's sort of hard to screw up.  Even if you only roughly follow the instructions below, you'll end up with something delicious.

Traditionally, Caponata is served as part of an Italian antipasto platter before the "real meal" begins, but if you're like me, the antipasto has some of the best stuff: briny olives, chunks of salty sharp Provolone, strips of sweet roasted peppers, cured Italian meats, and of course, Caponata.  This is certainly a wonderful way to enjoy it, but I'm so in love with this food that I have devised many more ways to appreciate it regularly--see below the recipe for an inspirational list.

Now, on to the ingredients:  depending on which region in Italy one hails from, Caponata is prepared in several variations: some include chopped olives or capers, some are more oily with fewer spices, some are infused with a heavy dose of citrus zest.  The version I wrote up here is of course, in my opinion, the best way to do it--the Sicilian way.  I thank my lovely Grandmother, Agatha, for instilling in me such a divine devotion to eggplant: via Gobbladina in the summer, and her rendition of Eggplant Parmesan the rest of the year--but that's for another post entirely.

Mangia!
K, feeling fiercely loyal to her wonderfully talented 90 year-old grandmother


Eggplant Caponata (or "Gobbladina")

1/3 cup olive oil
1 very large yellow/Spanish onion, cut into a 1-inch dice
1/4-1/2 t. red pepper flakes (increase according to your heat level preference)
4 garlic cloves, finely minced
2 medium eggplants (about 2 1/2 pounds total), cut into 1-inch cubes
1 T. sugar
1 t. ground cinnamon
1/2 t. unsweetened cocoa powder
2 t. fresh thyme
3/4 cup tomato sauce (from a small can of plain tomato sauce or homemade if you have it)
1/4 cup orange juice
salt and freshly ground pepper
1 T. capers, rinsed and drained (optional)
3-4 T. toasted pine nuts, for garnish (optional)

1. Once your ingredients are prepped, heat the olive oil in your largest skillet or enameled cast iron dutch oven.  When the oil is hot add the onion and red pepper flakes and sauté about 5 minutes until the onions are softened and almost translucent.  Add the garlic and stir another 1-2 minutes.
2.  Add the eggplant, stirring it around so it's coated with a bit of the oil and onion.  Then add in the sugar, cinnamon, cocoa powder and mix well.  Stir regularly for about five minutes until the eggplant is well softened.
3.  Add in the thyme, orange juice and tomato sauce and stir well.  When the mixture comes to a boil, lower the heat and simmer for 10-15 more minutes.  Season with salt and pepper.  Allow mixture to cool, then stir in extra virgin olive oil and capers if you're using them.  Top with pine nuts, if desired, or store in a Tupperware in the fridge for up to a couple of weeks (if it lasts that long).  The flavors develop really well overnight, so try to make it a day in advance.  It tastes best when served at room temperature.

Ideas for Enjoying Caponata at breakfast, lunch, dinner, and in-between...
plated next to grilled ciabatta bread and poached eggs for an elegant brunch
displayed on an antipasto platter with olives, cheese, roasted peppers, etc.
stuffed in a pita pocket with some garbonzo beans and feta cheese crumbles
laid on top of a crostini spread with goat cheese
stirred into a mild cannelini bean spread
stirred into cooked pasta, rice, or other grains (barley, quinoa, etc.)
spooned on top of grilled fish, chicken, tofu, or halloumi cheese
layered in a sandwich with turkey breast and mild cheese
mixed with simply steamed greens like baby spinach
tossed with some roasted, diced potatoes for an Italian "potato salad" 
rolled into a wrap with oil packed Italian tuna and fresh parsley


Tuesday, September 28, 2010

A First Attempt at a Lentil Soup


I do love lentils - in a rice pilaf, a good lentil loaf, in some chili.  But lentil soups turn me off.  In general, I have to be in a particular fall or winter mood to really crave soup as a meal, and some lentil soups (those thick mushy ones with brown lentils) remind me too much of baby food.  Not appetizing.  But I know people who love lentil soup.  Go crazy for it.  I don't really get it.  So I decided to try out a version that was more appealing to me.  This was a first go at lentil soup, and it definitely needs some work.  All the basic elements are there, but I wanted the flavor to be a bit richer and more savory. (Although, after eating the leftovers for lunch today, I gotta say, the soup improved overnight.)  Also, it's not really a "lentil soup" but rather a hearty vegetable soup that happens to have lentils in it.  And as summer is turning to fall here in Pittsburgh (I refuse to wear jacket for a few more weeks!), a nice hot soup on a chilly weekday night is pretty satisfying.  Especially with a blanket and a season premiere on Hulu. Enjoy!


Vegetable - Lentil Soup

1 head of cauliflower, chopped into bite sized pieces
1/2 large onion, chopped
3 large garlic cloves, minced
2 carrots, chopped
4 yellow potatoes, chopped into 1/2 inch cubes
1/2 cup white wine
4 cups stock (veggie or chicken)
1 1/2 cups red lentils
Dried thyme or herbes de provence
1 10 oz. package baby spinach
2 green onions, chopped

A loaf of country bread or some hearty rolls

1) Preheat oven to 375 and douse the cauliflower with olive oil and some salt.  When oven's ready, roast cauliflower till soft and browned, turning occasionally, about 30-45 minutes.
2) In a large stock pan, cook up the onion, garlic, and carrots in some olive oil, until the onions are soft and your kitchen smells delicious.
3) Add the potatoes and white wine and cook until the wine is slightly reduced, about 3-5 minutes. (Basically, you're just cooking out the alcohol flavor.)
4) Add the stock and bring to a boil.  Reduce heat to medium-low and cook for about 10 minutes.
5) Add the red lentils and taste the stock for flavor.  I used a homemade chicken stock and some salt-free veggie bullion, so I ended up adding a little more salt and some herbes de provence to enrich the flavor.  If you have a good hearty stock on hand, you might not need this extra boost.
6) Cook the soup until the lentils are soft and light orange in color (15-20 minutes). By this time, your cauliflower should be about done. Add the roasted cauliflower, spinach and green onions to the soup, and stir until the spinach is well wilted. Simmer for about 5 more minutes. Taste on last time for salt and acidity - add a little lemon juice or white wine and cook for a few minutes if it needs more acid.
7) Serve hot with some crusty bread and cuddle up with a book or a movie!

Sunday, September 12, 2010

Perfect Pasta Caprese


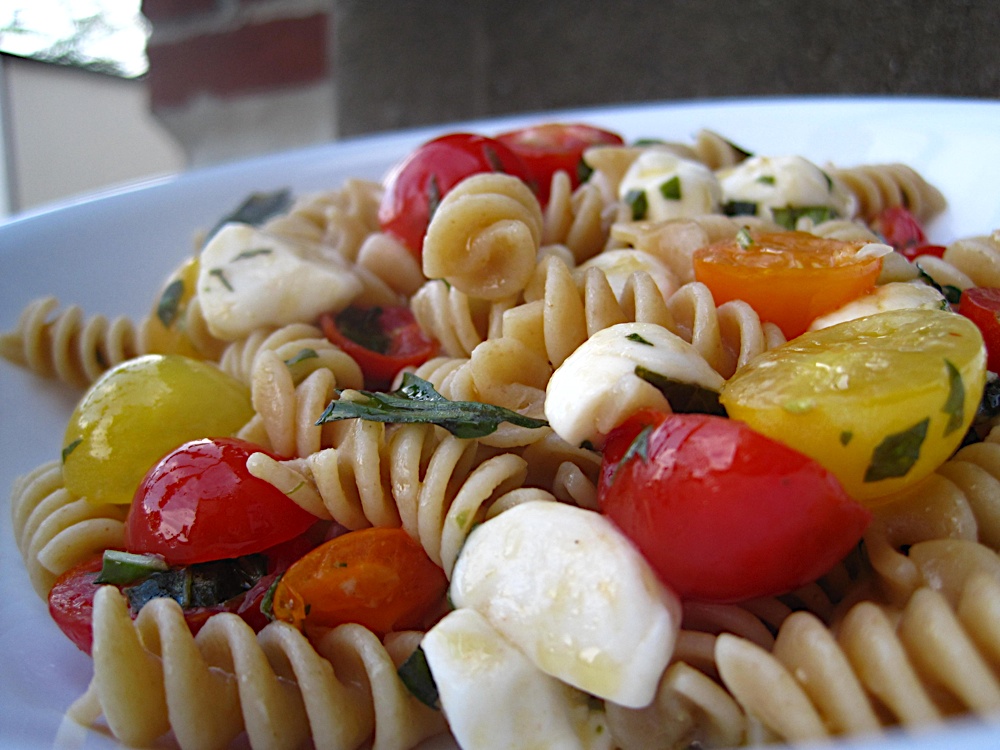
In theory, Pasta Caprese should be a delicious and simple dish.  You take the beloved, classic Italian trio (fresh tomatoes, basil, and mozzarella), toss it with some al dente pasta, add some olive oil, and voila--heaven in a dish, right?  More often than not, this deceptively simple combination turns out all wrong--too wet from the tomato innards, or too greasy from the olive oil, or simply too bland, with no zing or unifying element to highlight the main flavors.

Thursday, September 9, 2010

Zucchini Bonanza, Part 2: Zucchini Three Ways!

This is a long overdue post, considering this meal was prepared, photographed, and consumed more than a month ago!  It's been a busy summer and as I've prioritized other postings in the past few weeks, this one got left behind.

Here are three delicious things to do with the zucchini abundance and their flowers:


Fried Squash Blossoms Stuffed with Smoked Farmer's Cheese
Raw Zucchini "Pappardelle" with Fresh Basil Pesto
Whole Wheat Pizzettas with Zucchini Salsa

--K, high on the abundant summer produce

Sunday, September 5, 2010

Zucchini Bonanza! Zucchini and Feta Pancakes


Zucchini pancakes are a fantastic way to use up the heaps of zucchini that mysteriously appear on people's back car seats at this time of year...(any Garrison Keillor fans?)  They're a simple and adaptable base for a variety of cheeses, aromatics, herbs, etc.; they're good on salads, sandwiches, and on their own; they're good hot, warm, room temperature, or chilled; and they freeze very well.

My dear friend Promise makes a version of these delicious savory pancakes, so whenever I make them, I think of her.  I'm fairly certain that she's partial to the Moosewood cookbook version, which involves beating egg whites and then folding them into the main mixture, which adds a lightness to the batter.  I prefer this one-bowl version for its ease, even if the pancakes tend to be hearty and dense--this works since I'm usually using them as a meatless main dish rather than as a side.

Monday, August 30, 2010

Grilled Summer Vegetable Sandwich


Sometimes when I'm working out at the gym and Law and Order is over and I need something else to watch, I flip the mini flat-screen in front of my usual treadmill to the Food Network.  Last week Bobby Flay made an incredible looking Italian-inspired grilled vegetable sandwich, and I thought--such a simple idea, and something I haven't done all summer!

This recipe is simple in technique, but it's time consuming to grill everything properly.  I suppose you could take a short-cut by purchasing plain grilled veggies from the prepared foods section of the grocery store, but that's almost too easy.

--K, happy to be back in Pittsburgh

Here are some tips and the alterations I made to Bobby's recipe:

-The garlic mayo is totally key here.  I used Veganaise instead, but don't skimp on the garlic.
-I also spread some tears of fresh basil on top of the two mayo applications.
-I added a layer of grilled zucchini in addition to the grilled eggplant.
-Another key to a successful sandwhich is that you season every component very well with salt and pepper--lube them up with some olive oil and sprinkle seasonings generously before grilling.  Then everything will come together well at the end.
-I skipped the arugula because I didn't have any, but I added thin slices of tomato.
-I roasted a yellow pepper instead of red, which added a nice sweetness and also brightened the sandwich layers with a silky pop of color.
-Use a whole ciabatta as instructed and then once the sandwich is composed, slice it to make individual servings for your lucky friends.

Delicioso.

Thursday, August 26, 2010

Sesame-Soy Quinoa Salad with Tomatoes and Green Beans

Wowies...there's lots of summer catch-up posting to be done in friendly foodie land!  After my small-ish posting binge in July, I went to New York for a few weeks to do some research and visit with my fam.  And as soon as Emily got back from Peru, she started a new job here in the 'burgh, yay roomie!  Needless to say, we haven't been so great about keeping up with a posting rhythm.  That doesn't mean we haven't been making lots of tasty meals with fabulous summer produce, we just haven't translated them to digital space.

In these precious last few days of August, I will attempt to remedy the recent lag, focusing especially on delicious and simple ways to use some produce that's in tip-top shape these days: tomatoes, peaches, eggplant, zucchini, corn, green beans, etc.

Thursday, July 22, 2010

Instant Love: Avocado "Fries"

"Instant Love" is my new tag idea for quick bites that don't really require a serious recipe (although our recipes are always more like recommendations than dogmatic prescriptions).  These posts will generally have few ingredients and can come together quickly.  "Instant Love" is a simple, delicious food idea put forth with, well love.  Obviously.

So, when my brother spots something exceptionally delicious-looking online, it's fairly certain he will attempt to create the dish within a week's time.  So, you can understand why I was thrilled when he sent me this link about crispy, creamy avocado fries about a week before I was slated to arrive in NY for a family visit.

Sure enough, my first night in NY with the fam was spent drooling over these delights, and trying to coax my mother to taste a bite (she is, as you can probably tell already, an extremely picky eater.)  Of course, Joey and I didn't fight her too hard...more for us!  They're really easy to prepare if you have a just ripe, but still firm large avocado sliced up nicely, hot canola oil, and panko.  We added a few squeezes of lime juice and were, well, blissed out.

--K, blissed out.

Tuesday, July 13, 2010

Cannellini Bean Salad with Tomatoes and Dill


Summer's abundant piles of fresh produce and high temperatures often collude to lure us foodies away from the stove, oven, grill, and even our significant other, if he/she is radiating too much heat.  The temperature has hovered in the upper 90s around here lately, and inspired me to throw together some light and no-heat-necessary summery salads.  Of course, "no-heat" for this recipe suggests using canned cannellini beans, which are, of course, convenient and pre-cooked.  I've been trying to avoid using canned goods, however.   


So:  One strategy for minimizing your use of the stove top or oven during particularly heat-wave-like weeks is to prepare 1 or 2 large batches of plain beans or veggies that you can keep in the fridge and recycle in various ways throughout the week.  For example, last week I cooked a big batch (32 oz.) of dried cannellini beans early in the morning before the kitchen got too hot.  Once they were cooked, I drained them and tossed them with a touch of canola oil to keep them covered in the fridge.  They've been used as: a smashed cannellini-rosemary-lemon dip, a spicy garlic sandwich spread, a protein boost for some steamed broccoli, and now, in a light tomato and dill salad.  


A note about dill: if you don't happen to like it, simply substitute any herb you do like.  As much as I love fresh basil during the summer months, I often feel bad for the other delectable fresh herbs growing all around me (rosemary, dill, tarragon, mint, thyme) that tend to get ignored in favor of basil, and try to let them shine in their own dishes.  Tomatoes, which usually get thrown together in a caprese salad with basil and mozzarella, pair especially well with fresh fronds of dill.  This salad exemplifies a classic Greek combination of flavors. 

--K, absolutely loving the available fresh herbs these days

approx. 1/4 c. dill sprigs, roughly torn into little fronds
3 T. red wine vinegar
1/3 c. canola oil or olive oil
salt and fresh ground pepper

Whisk these together at the bottom of a large mixing bowl.  It's meant to be very tangy, but you can adjust the proportions if you like.  Add to this:

2 c. cooked cannellini beans
4 medium tomatoes, cut in half lengthwise, and then sliced into slim wedges
feta or goat cheese (optional)
1/4 c. red onion, finely sliced (optional)

Toss everything together gently so the tomato wedges stay mostly intact.  Cover bowl and allow to marinate at room temperature for about 30 minutes.  Stir and serve in cheery bowls for a light summer supper for 2.


Friday, July 9, 2010

A Favorite Summer Sandwich

When I was in junior high and high school, I had a (now embarrassing) obsession with a certain set of films starring Meg Ryan.  I made pilgrimages to all of the Upper West Side locations featured in You've Got Mail, including the famous Café Lalo.  It was over lunch with a friend at this charming café, which is known for its outstanding desserts, that I discovered a simple yet spectacular combination of ingredients that have since topped many slices of toast in my house: avocado, sprouts, bell pepper, and Bulgarian feta.  Perfect on a hot summer afternoon, or anytime you need a quick but special lunch.  Below is my reverie.

--K, amused by her past obsessions


A sturdy piece of whole grain toast is topped with a mildly grassy, herbal bed of sprouts.  These are topped with rich slices of creamy avocado, glistening under a light drizzle of sweet, spicy balsamic vinaigrette.  These velvety low notes are complemented by exquisite salty-fresh high notes combining generous sprinkles of crunchy, sweet red bell pepper and the enticing briny tang of fresh, moist feta crumbles... 


Toast 4 slices of a hearty multi-grain bread, rub gently with a slice from 1 clove garlic.

Top toasts with a few handfuls of fresh sprouts, then layer slices from 1 ripe Hass avocado.
  
Drizzle a favorite Balsamic vinegar or vinaigrette over avocado with a pinch of coarse salt.

Add some finely diced red bell pepper and crumbles of Bulgarian feta cheese (other kinds of feta work well too).  Finish with a few grinds of fresh pepper.  *Bonus: squeeze a touch of fresh lemon juice and a drizzle of fancy extra-virgin olive oil over the plate before serving.

Serves 2...Bliss.  wink wink.


Grilled and Stuffed Mediterranean Eggplant


This is the stuff Emily referenced in her Kamut berry salad post.  I had some baby eggplants from the farmer’s market and some other bits and pieces around the kitchen, including some leftover cooked rice, soon-to-be-bad grape tomatoes and fat-free feta.  I also had a package of Lightlife Smart Ground sitting in the fridge, which I’d bought on a whim at Whole Foods because it was on sale, even though I didn’t have a real plan to use it well.  This seemed like an ideal time to make…vegetable stuffing!  If you’ll recall a previous post, you’ll notice I like to make interesting veggie-stuffed vegetables when there’s a random mix of things to be used up.  So here we go...


--K, feeling accomplished after making use of random things in the fridge

3 baby eggplants, sliced in half lengthwise
2 T. canola oil, divided
1-2 cups leftover cooked rice, barley, or other grain
½ small red onion, chopped
1 cup grape tomatoes, halved
2 tablespoons toasted pine nuts
2 tsp. cumin
1 tsp. dried oregano
1 T. fresh mint, chopped, plus some whole leaves for garnish
¼ cup feta or fat-free feta (optional)
salt and fresh ground pepper to taste
lemon juice

1. Prepare grill to medium-high heat.  Brush about 1 T. on the cut sides of the eggplant so it won’t stick to the grates.  When grill is ready, place eggplant halves cut-side down on grill and cook until the flesh is very soft and slightly charred, about 15 minutes.


2.  In the meantime, begin to prepare the stuffing.  Sauté the red onion in a large skillet over medium-high heat, until onion is soft and translucent.  Add the tomatoes and allow them to soften slightly, for a minute or two.  Next add in the Lightlife Smart Ground crumbles and reduce heat to medium-low.  Sprinkle the cumin and oregano on top, and stir constantly until the Ground is very slightly browned.  Transfer mixture to a large bowl, add cooked rice, fresh mint, and pine nuts and set aside.

3.  When eggplant is cooked, allow to cool (you can place them in the fridge for a few minutes to speed the process), and then carefully scoop out the flesh leaving the skin intact.  Roughly chop the eggplant flesh into medium sized chunks, and add to stuffing mixture in bowl.  Mix the stuffing well and season liberally with salt, pepper, and lemon juice.

4.  When stuffing is ready, gently scoop a few spoonfuls back into the eggplant halves; top with some mint leaves and serve right away.  Or if preferred, top each eggplant half with some crumbled feta cheese and zap under the broiler for a few minutes—be sure to watch carefully so it doesn’t burn.  These are delicious eaten hot, cold, or at room temperature. 


We served ours with roasted cauliflower, since Roomie's on that kick lately.